

In brief
The essentials of a certificate-based connection.
- Register the public certificate with the application and keep its private key available to the authenticating process.
- Create an application user with the security role needed for the connection.
- This 2021 walkthrough includes certificate-store and connection-string examples; check current Microsoft guidance before using it in a new project.
Originally published in 2021. This walkthrough retains the interfaces and libraries used at the time. For a new project, start with Microsoft’s current Dataverse authentication guidance.
As the continuation to my earlier blog post, “Connect MFA Enabled D365 CDS Programamatically” , where we connected to D365 using ClientSecret programmatically, we will learn how we can use Certificates for the same. Certificate-based authentication is a more secure way to achieve S2S (server-to-server) authentication and establishing the connection to D365 Dataverse/CDS.
So, let’s get started.
Step 1: Set up certificates
This example uses a self-signed or CA-issued certificate. You can use an existing certificate or follow the steps below to create a self-signed certificate in Azure Key Vault.
- Log in to the Azure portal at https://portal.azure.com. Open Key vaults and select Create. Choose an existing resource group or create one.
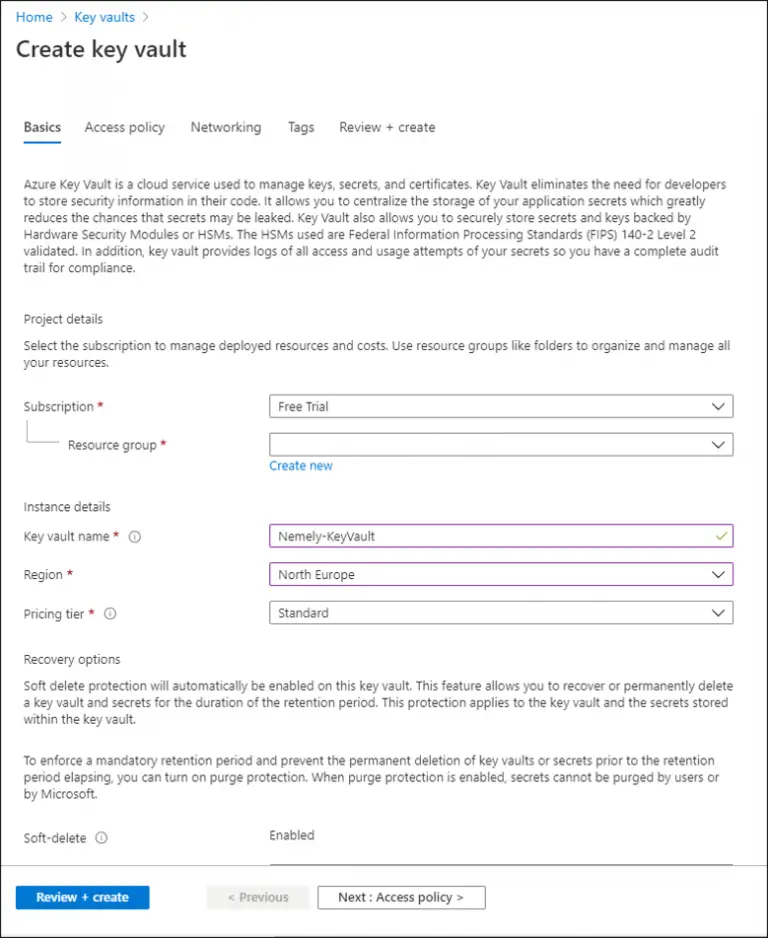
Complete the form to create the key vault.
- In the new key vault, open Certificates and select Generate/Import. Use Generate to create a certificate or Import to add an existing one.
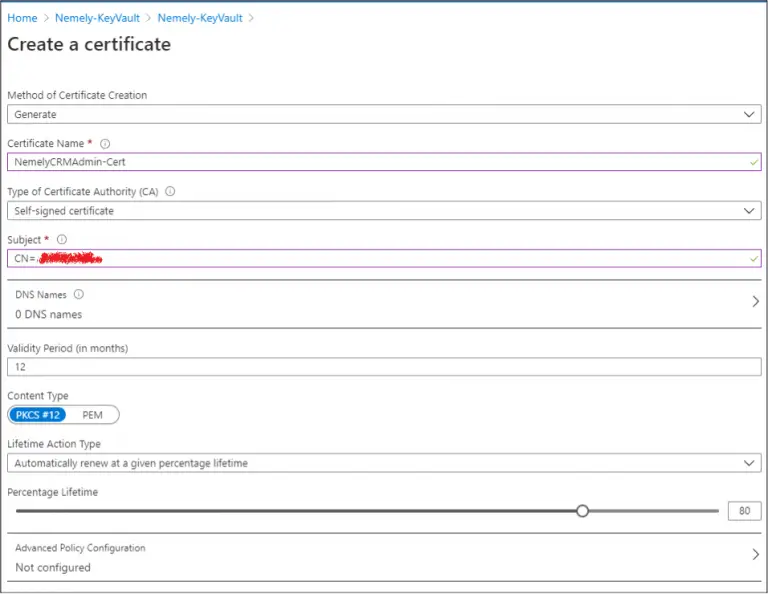
Download the public certificate in CER format for the application registration. For the local certificate-store approach below, use a protected PFX that includes the private key.

Step 2: Get the application ID and upload the public certificate using Azure Active Directory
- Log in to the Azure portal at https://portal.azure.com. Open Azure Active Directory, select App registrations and choose New registration.
- Give the application a name, select Register and copy the generated application ID.
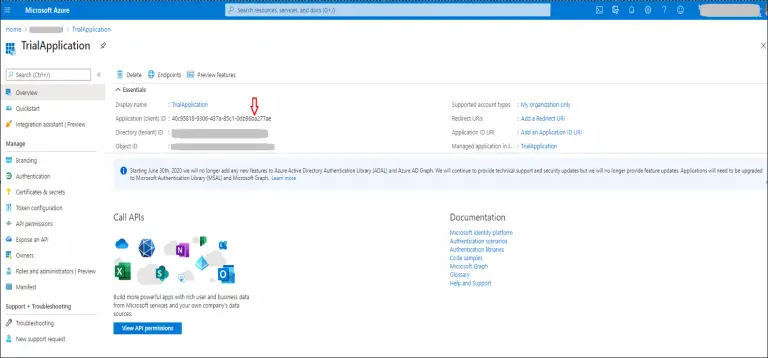
- Now click on Certificates and Secrets for your app. Click on ‘Upload Certificate’ and upload CER certificate you downloaded from step key vault. Once added, copy Thumbprint Value.
Step 3: Import the certificate into the local certificate store
Import the certificate and its private key into the certificate store used by the application. For this local-store approach, use a protected PFX file and allow the application’s runtime identity to read the private key. Upload only the public certificate to the app registration. See Microsoft’s certificate guidance for the private-key requirement.
Step 4: Add an application user in the D365 CDS environment
- Log in to the D365 CDS environment.
- Go to Settings – Security – Users.
- Switch to the Application Users view and select New. Use the Application User form.
- Enter the required details and the application ID generated in step 2.
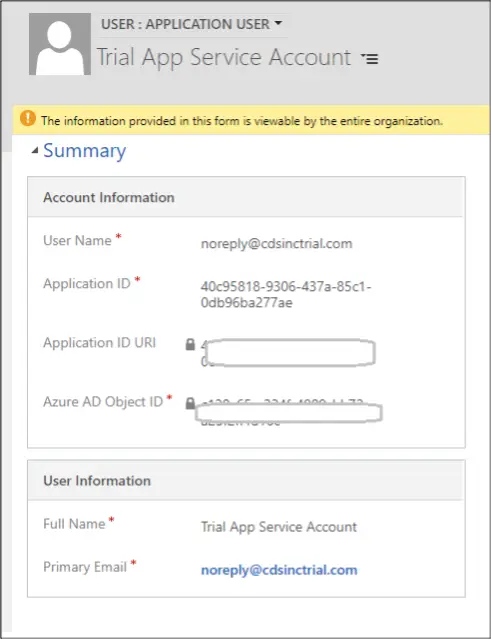
Step 5: Add the C# connection string
Format
string connectionString = "AuthType=Certificate;Url=YOUR_ORGANIZATION_URL;AppId=YOUR_APPLICATION_ID;Thumbprint=YOUR_CERTIFICATE_THUMBPRINT";Example
string connectionString = "AuthType=Certificate;Url=https://your-organization.crm.dynamics.com;AppId=YOUR_APPLICATION_ID;Thumbprint=YOUR_CERTIFICATE_THUMBPRINT";Replace the organization URL, application ID and certificate thumbprint with the values for your environment.
Common error
- Error: Microsoft.Powerplatform.Cds.Client.Utils.CdsConnectionException: Failed to connect to Common Data Service — System.Exception: Failed to locate or read certificate from passed thumbprint. — System.Exception: Failed to find certificate with thumbprint: XXXXXXXXXXXXXXXXXXXXXX.
- Solution: Check if you have imported the certificate to your local certificate store.
References
Related resource
Microsoft: Dataverse connection strings
Hope this helps to achieve your goal. Please let us know if you have any questions.
Related resource