

In brief
Three parts of the client-secret connection.
- Register an application and create its client secret.
- Create an application user and assign the appropriate security role in the environment.
- Use the application details in the C# connection string; this walkthrough reflects the 2020 interface.
Originally published in 2020. This walkthrough retains the interfaces and libraries used at the time. For a new project, start with Microsoft’s current Dataverse authentication guidance.
Microsoft deprecated WS-Trust authentication for Common Data Service client connections. See Microsoft’s deprecation notice for details.
Note: This change only impacts client applications that connect to the Common Data Service. It does not impact custom plug-ins, workflow activities, or on-premises/IFD service connections.
Many organizations also use multi-factor authentication to protect user sign-ins.
This archived walkthrough shows an application connection using Azure Active Directory, the name used in the original interface.
Step 1: Get the application ID and client secret using Azure Active Directory
- Log in to the Azure portal at https://portal.azure.com. Open Azure Active Directory, select App registrations and choose New registration.
- Give the application a name, select Register and copy the generated application ID.
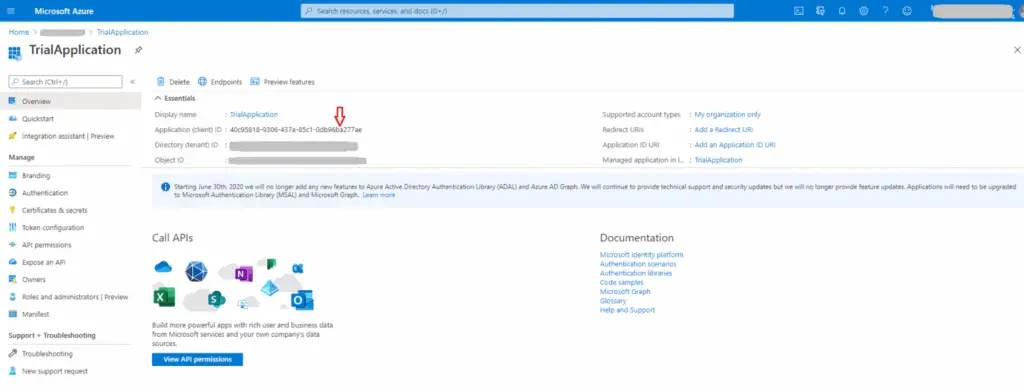
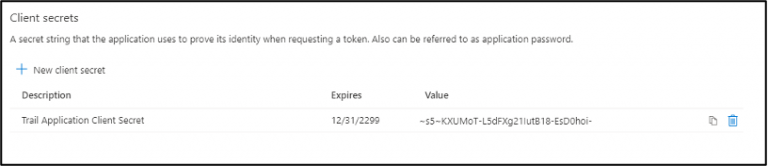
Now click on Certificates and Secrets for your app. Click on ‘New Client Secret’, add description and expiry details. Once added, copy ‘Client Secret Key Value’.
Step 2: Add an application user in the D365 CDS environment
- Log in to the D365 CDS environment.
- Go to Settings – Security – Users.
- Switch to the Application Users view and select New. Use the Application User form.
- Enter the required details and the application ID generated in step 1.
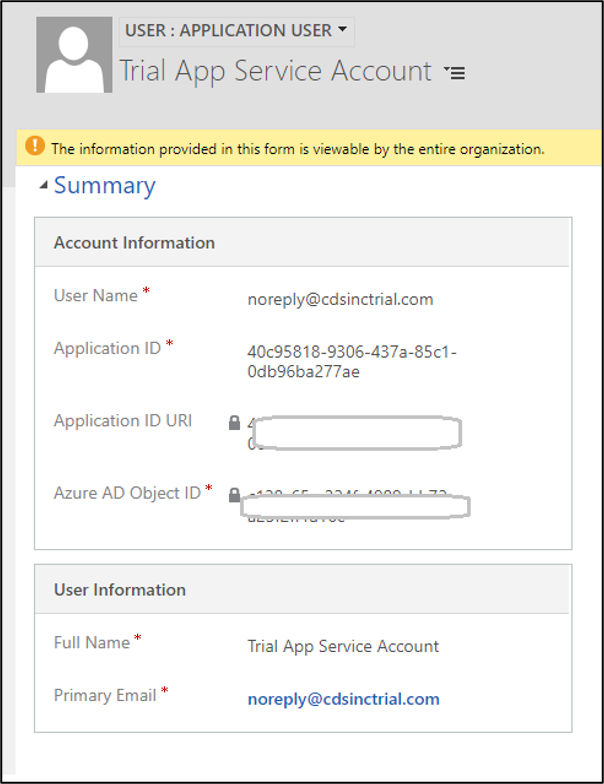
- Assign an appropriate security role to the application user, following your organization’s security configuration.
Step 3: Add the C# connection string
Format
string connectionString = "AuthType=ClientSecret;Url=YOUR_ORGANIZATION_URL;ClientId=YOUR_APPLICATION_ID;ClientSecret=YOUR_CLIENT_SECRET";Example
string connectionString = "AuthType=ClientSecret;Url=https://your-organization.crm.dynamics.com;ClientId=YOUR_APPLICATION_ID;ClientSecret=YOUR_CLIENT_SECRET";The example values are placeholders. Keep the client secret in protected configuration rather than directly in source code. See Microsoft’s connection-string guidance for the supported parameters and configuration approach.
Code example: replace the placeholders
Related resource
Code example 1
References
Related resource
Microsoft: Office365 authentication deprecation
Hope this helps to achieve your goal.